Tire Service
Maintenance
If your tire is flat, you will need to jack up the car, take off the wheel, and put on the new tire. If you need to rotate your tires, you will have to take all of the wheels off and switch them around in a certain order. If your car has a tire pressure monitoring system, you will also need to use the relearn process after rotating your tires so that your car knows the new positions of the sensors.

CAUTION
Performing your own car maintenance comes with risks and can be dangerous if not done properly. Using incorrect tools or techniques can cause serious damage to your vehicle or lead to injury. While our guides are easy to understand, they do not provide vehicle-specific instructions. Do not attempt to do maintenance work on your car if unsure how to do it.
NOTICE
The following information applies to servicing tires:
In order to take tires off, the car must be jacked up with two or all wheels off the ground. ASSUME ALL RISKS that are associated with jacking up a car. (Even though you should not need to go under the car for tire service) a jacked up car could fall on you, leading to serious injury or death. Make sure that your car is off, in park with the emergency brake on, and that the wheels on the ground are properly chocked to prevent rolling. NEVER use jacks on any surface other than flat, hard asphalt or concrete.
Skip to Procedure
STEP 0
Gather the necessary supplies and tools for this job
REQUIRED
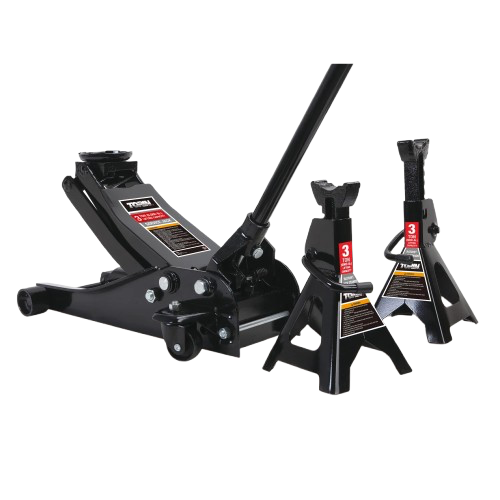
Floor Jack and Jack Stands
If you are changing a flat, a scissor jack will be fine.
If servicing front or back wheels in pairs, a floor jack and 2 jack stands is required.
If rotating tires, you will need 4 jack stands to have your car completely off the ground.


Breaker Bar
Used to break loose the lug nuts
(Could use impact wrench with sockets instead, but this is much cheaper)
Socket
Need just one socket that fits your wheel's lug nuts
RECOMMENDED (optional)

Radiator Funnel Kit
Attaches directly to the radiator or reservoir to prevent spills and to allow you to remove all air from the cooling system within one session
Floor Jack and Jack Stands
Needed if you cannot work under your car

Gloves (nitrile material)
Protects your skin from coolant

Siphon
Helps to remove coolant from the reservoir much easier (if the reservoir does not have a drain plug)
STEP 1
Drain the old coolant out of the system
To help the coolant drain faster, open both the radiator and coolant reservoir caps. This will add air pressure to the system as the coolant drains. Most cars have both caps, but this applies even if you only have one of the caps.

Locate the coolant drain plug. This is typically located at the bottom of the radiator. The exact location and size of this bolt varies per vehicle. Below is an example of what the drain plug might look like. Note that not all cars have one (see the alternative draining section below the image).
With your drain pan underneath the plug, rotate the petcock (valve) counterclockwise until the coolant flows out. If the petcock is not loosening easily, DO NOT force it as drain plugs are usually fragile and can break easily. Instead, refer to the next section on alternative draining.

If your car does not have a drain plug, you will need to disconnect the lower radiator hose to drain the coolant. This is the large hose that connects to the bottom of the radiator. After placing your drain pan underneath the connection point, undo the hose clamp* and pull the hose off. Expect coolant to drain quickly.

Once the coolant is flowing either out of the drain plug or directly out of the radiator and hose, allow it to completely stop flowing before moving on. This may take several minutes, especially as flow decreases. Once it stops, finger tighten the drain plug or re-attach the lower radiator hose.
*Hose clamps have different release types on different vehicles. Some may use a screw while others can be unclamped by squeezing with pliers. Make sure to learn how your clamp works before unclamping the hose.
STEP 2
Drain the coolant reservoir
Now the remaining coolant in the resevoir must be drained. Depending on the car, some have a drain plug on the bottom of the reservoir and some do not. If you are unsure, Google your car model online to find out. If the reservoir fully drained in the last step, skip to Step 3.
If you have a reservoir drain plug, position the drain pan underneath it and loosen it to allow the reservoir to drain. If not, there are a couple of options:
The easiest solution would be to inesert a siphon into the top of the reservoir and pump out the remaining fluid. The other would be to check and see if the reservoir has a hose that connects to the bototm of the tank. If it does, try to safely disconnect the top part of the hose from the radiator (or wherever it is connected) and move it fully below the reservoir, allowing it to drain from the bottom into the pan.

Once the reservoir is empty, finger tighten the drain plug or re-attach the hose. Then close the reservoir cap.
STEP 3
Flushing the system
Using distilled water to flush the cooling system is important to get rid of any build-up or leftover old coolant. Some people will use chemical coolant flush products to fluh the system, but most times, plain distilled water will do the same job and is easier than mixing in more chemicals. Before filling the system, DOUBLE CHECK that any value or hose that was loosened or removed has been put back and tightened.
For this step, a funnel is highly recommended (the upgraded funnel can be used but is more important to adding the new coolant). Add distilled water directly into the radiator via the radiator filler neck (the hole that the radiator cap covers). If your car doesn't have a radiator cap, add distilled water directly to the reservoir. If using a funnel, hold the funnel so that it is not sitting inside the filler neck (the funnel sitting inside will block air from escaping and could trap air in the cooling hoses).

Continue filling until the water level comes to the bottom of the radiator filler neck (or to the fill line of the reservoir if adding directly to it). Then screw back on the radiator and reservoir caps. Check for leaks where you drained the coolant.
To circulate the water throughout the system, idle your car for 10-15 minutes with the heater on full blast. This will allow the water to flush the entire cooling system and the heater core. Continue to check on your car's temperature gauge (if it has one) or make sure that the overheating lamp is not on. The engine should not overheat during this process, but if it does, immediately shut the engine off and let it cool down before checking for issues.
After the idle period, allow the engine to fully cool down (30-60 minutes). Then repeat step 1 to drain the dirty distilled water. If any water is left in the reservoir, repeat step 2 to drain it.
The more you flush the system, the cleaner it will get, but the amount of old coolant removed goes down with every flush, so you should not need more than 2-3 max. Repeat this step as many times as you want to flush the system. When flushing again, use new distilled water, not the water from a previous flush. Note that it is not necessary to flush more than once.
STEP 4
Adding the new coolant
Before adding the new coolant, again DOUBLE CHECK that any value or hose that was loosened or removed has been put back and tightened.
To add the new coolant, the same procedure as adding the distilled water is followed. Any funnel should be used, but using the funnel kit will allow the coolant system to self-burp the air out of the lines.
Add the coolant directly into the radiator via the radiator filler neck (or into the reservoir if your car does not have a radiator cap). If using a regular funnel, remember to hold the funnel so that it is not sitting inside the filler neck. If using the upgraded funnel kit, see the extra step below for instructions.

Continue filling the radiator up to the max capacity of coolant that your engine takes (refer to owner's manual to find out how much to add). If the coolant reaches the top of the filler neck (or reservoir line) before this capacity is met, it is ok. This probably means that there is air that hasn't been "burped" out of the system. See the extra step below now.

If you are able to fill the radiator to capacity right away, close the radiator cap and fill the reservoir up to the max line.
STEP 5
Testing the cooling system
Once you have filled the radiator (and burped it if needed), drive for about 5-10 miles, making sure to watch the temperature gauge or overheat lamp. If the engine starts to overheat (very rare), stop driving immediately and wait for the engine to cool down. Then check for leaks or issues with the system. Always call a mechanic if unsure of what to do.
If you are able to complete the drive with no issues, wait until the engine completely cools before opening the radiator cap or checking inside the reservoir. Even if you were able to fill the system to capacity or burp the radiator, it's still a good idea to make sure the coolant level is still at the bottom of the filler neck or around the max fill in the reservoir.
If the coolant level is unchanging and if you filled the coolant via the radiator cap, the final step is to fill the reservoir to its max fill line (if you don't have a cap, you already filled the reservoir). If there aren't any other leaks at this point and the coolant levels are not changing, the job is complete.
If the level of coolant has dropped, this means that there was air in the system that prevented the lines from being filled to the max. See the below step on burping the cooling system.
EXTRA STEP
Burping air from the system + using the funnel kit
When you drain and add coolant, air will be introduced to the system. When the coolant circulates around the engine, it can move these air pockets around, so getting them out of the coolant lines is very important.
The upgraded coolant funnel kit is the easiest solution to use in this case. Using the standard funnel might require several more top-offs throughout the week as more air surfaces in the radiator or reservoir. This special funnel screws onto the radiator neck or reservoir and allow air bubbles to surface and be replaced by new coolant that is in the funnel. Here's how to properly use it:
- If your car has a radiator cap, screw the funnel onto the filler neck using the included adapters. If your car does not have a radiator cap, attach it to the reservoir. Use elbow or extension pipe pieces if needed.
- If the funnel is on the radiator, pour coolant in until the funnel is about 1/4 full. If the funnel is on the reservoir, pour coolant in until it reaches the reservoir line, then use the funnel plug to stop the coolant from going into the reservoir and fill funnel to 1/4 full. It is ok for the filler neck to be full to the top but the reservoir should NEVER be filled to the top.
- Now start the engine. As the engine idles and the coolant circulates, you will notice either air bubbles surfacing (radiator cap) or a decreasing coolant level (radiator or reservoir).
- If using the radiator cap, the coolant level will rise as the coolant heats and expands but then may decrease as the coolant replaces the air pockets. Add more to the funnel as needed as long as the level does not spill over the top. If using the reservoir, periodically open the funnel plug to let the coolant level return to the full line. Then, plug the funnel again and add coolant as needed.
- After a while of not seeing bubbles or a change in coolant level, turn off the engine and wait 5-10 minutes. After waiting, pull the funnel off. Use the plug if there is still coolant left in the funnel. BE CAREFUL - the coolant from the radiator is probably still HOT. Open the plug over the drain pan. Finally, replace the radiator or reservoir caps.
- Now test drive the car (see Step 5). Just because you used the upgraded funnel doesn't mean that you should not check the coolant levels once the engine cools down after driving. Do this to confirm that the levels have not changed. If they have, you don't have to repeat the entire process, just top off the level. Repeat until the level is consistent.
If you needed to burp the engine without the upgraded funnel, this may take days to finish (which is why it is recommended to get the funnel kit). As you drive, air will continue to come to the top of the system, causing the coolant level to drop. After driving and after the engine fully cools down, continue to add coolant to the top of the filler neck or to the fill line in the reservoir, then replace the caps. Repeat this check and fill process until the level is consistent. Then, the job is finished.
Close ×
Basics of oil ratings:
SAE oil viscosity ratings are written in the following format #W-##. The number followed by "W" is the cold rating and the second number is the hot rating of the oil. Selecting the correct oil viscosity for your engine is crucial for maximizing performance and engine longevity.

Selecting the correct oil for your car:
Look for your car's oil information in your owner's manual. Use the index to search for oil information. This page will tell you the type of oil that you need for your engine as well as the oil capacity of the engine. On some cars, the type of oil will also be painted on the oil fill cap.